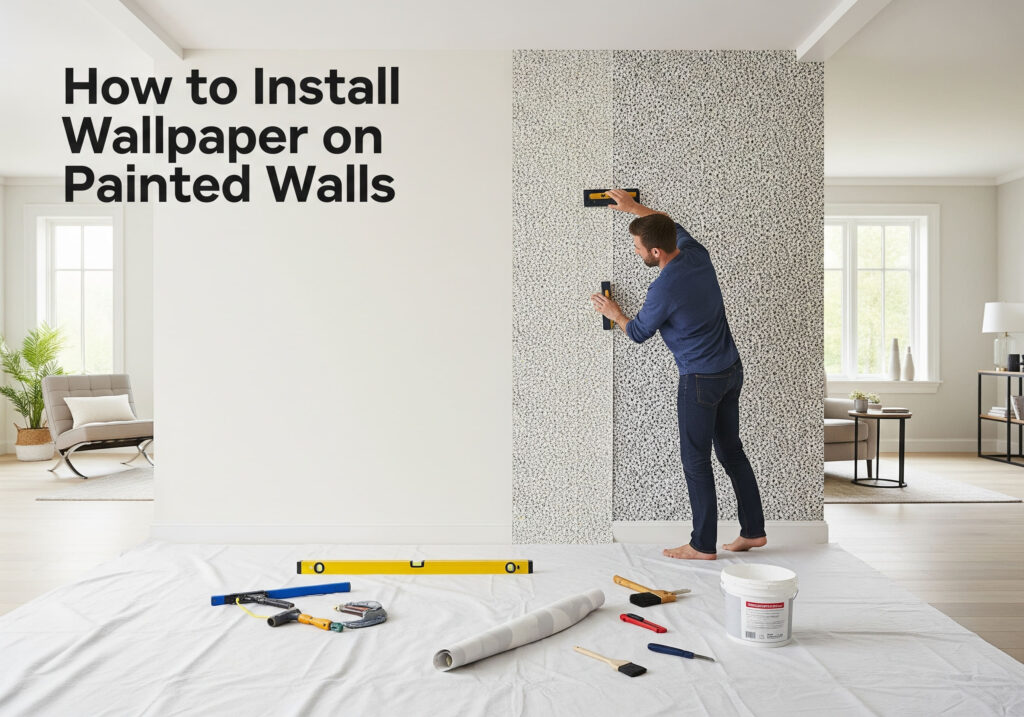
Yes, you can wallpaper a painted wall, but the secret is in the preparation. To get a smooth, lasting finish, clean and smooth the wall first, then apply a quality primer before hanging the paper. In other words, fix any cracks or holes, wash away dust and grease, sand glossy spots, and seal the surface with primer. Once that base is ready, you can measure, cut, paste, and hang the wallpaper strips. Following these steps will help the adhesive stick properly and prevent bubbles or peeling later.
Why Prepare the Painted Wall?
Before you start, check the condition of the paint. Wallpaper will not stick well to flaking, chalky, or very textured paint. Remove any loose paint, nails, hooks, or outlet covers and fill holes or dents with spackle, then sand smooth. Even small bumps can show through the paper or trap moisture, so aim for a flat, even surface.
Next, clean the wall thoroughly. Walls in kitchens or bathrooms often have invisible grease and grime that can ruin wallpaper adhesion. Wash painted walls with warm water and mild detergent or a cleaner like trisodium phosphate (TSP) to remove dirt. Dry-cleaning sponges or a solution of vinegar and water also work. After cleaning, let the wall dry completely. If there’s any dust from sanding, vacuum or wipe it off before moving on.
Different paint types may need special care. Glossy or semi-gloss paint is slick, so lightly sand it with fine-grit sandpaper to “key” the surface and wipe away dust. Flat or matte paint is porous and may soak up glue unevenly; sealing it with primer prevents this issue. Modern low-VOC paints sometimes leave behind residues that repel wallpaper paste. In that case, wipe the wall with a 70% isopropyl alcohol solution (rubbing alcohol mixed with water) to remove any contaminants. Finally, prime the wall with a clear or tinted wallpaper primer or sizing. Primer creates a sticky, uniform surface that helps the wallpaper adhesive grip and makes future removal easier. If your wallpaper is dark or has strong colors, tint the primer to a similar shade so the seams won’t show through.
Step 1: Smooth and Seal the Wall
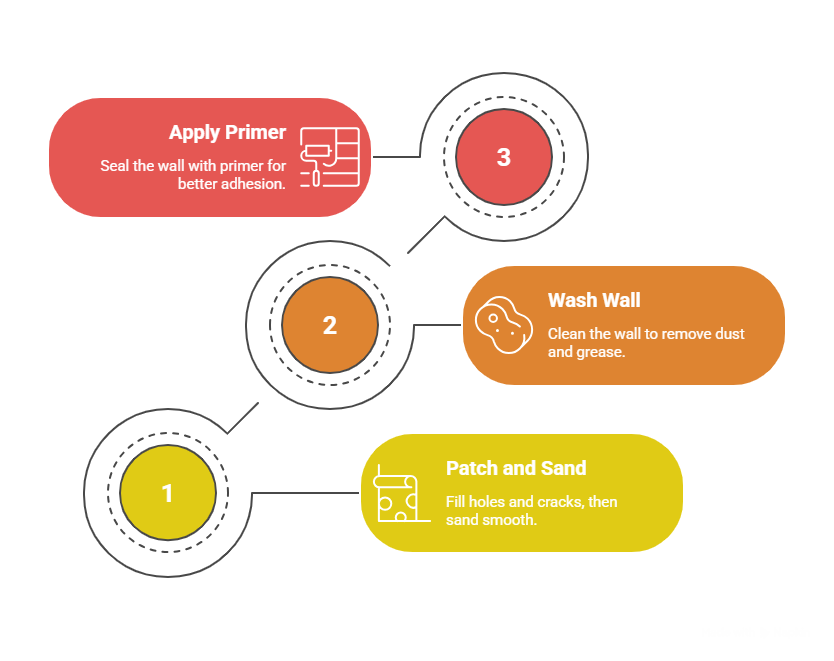
- Patch and sand. Fill nail holes and cracks with joint compound or spackle, let it dry, then sand flat. If the wall has heavy texture, consider applying a thin skim coat of joint compound to even it out, then sand smooth. The smoother the wall, the less the paper pattern will highlight any imperfections.
- Wash off dust and grease. After sanding, clean the wall again. A vinegar-water rinse or a gentle all-purpose cleaner will remove leftover dust or oily residues. Make sure the surface is completely dry before moving on.
- Prime the surface. Roll on a wallcovering primer or acrylic primer compatible with wallpaper. Primer seals porous spots and helps paste adhere evenly. Follow product instructions—most primers need about 24 hours to dry before papering. (If your wallpaper is peel-and-stick, primer is especially important on porous or painted walls.) With primer down, your wall is ready to receive the wallpaper.
Step 2: Measure and Cut Wallpaper

- Clear the room and tools. Move furniture away from walls and lay down drop cloths. Have your tools ready: measuring tape, pencil, a level or plumb line, scissors or utility knife, and your wallpaper (with any pattern repeats noted).
- Mark a plumb line. Find a starting point at the ceiling edge, preferably in an inconspicuous corner. Using a level or laser level, draw a straight vertical line on the wall. This plumb line ensures your first strip will hang perfectly straight. Even a tiny tilt at the start can throw off the entire pattern alignment.
- Measure and cut strips. Measure the wall height from ceiling to baseboard. Cut your first wallpaper strip at least 2–3 inches longer than this measurement (extra at top and bottom allows for trimming). If the wallpaper has a repeating pattern, line up the second strip so its top matches the end of the pattern on the first. Label or stack strips in order to avoid confusion.
Step 3: Apply Adhesive & Hang the Wallpaper
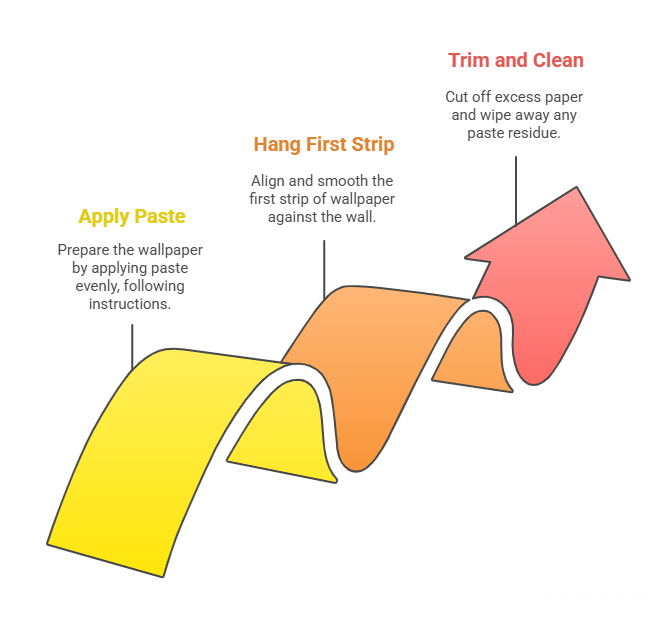
- Apply paste. Follow the wallpaper and adhesive instructions. For pre-pasted wallpaper, activate the paste by soaking the strip or “booking” it as directed. For paste-the-wall or unpasted paper, use a roller or brush to spread an even layer of wallpaper paste onto the wall (or onto the back of the paper, depending on the product). Work on an area slightly wider than one strip. The key is not to glob on too much paste; a thin, even coat is best.
- Hang the first strip. Align the edge of the cut wallpaper with your plumb line at the ceiling. Carefully unroll the strip, smoothing it down from the top to bottom. Use a plastic smoothing tool or a clean, dry cloth to press the paper against the wall, starting from the center and moving outward. This pushes out any air bubbles or excess paste. Be gentle near the seams to avoid tearing.
- Trim and clean. Once the strip is in place, trim the extra paper at the ceiling and floor using a sharp utility knife and a straightedge. Wipe off any paste that squeezes out of the edges or seams with a damp sponge—don’t let paste dry on the wallpaper surface.
Step 4: Continue and Finish
- Match the pattern. For each new strip, follow the same process: apply paste to the wall, align the paper’s top with the last one, and butt the new edge tightly against the previous strip. Carefully match any printed pattern from one strip to the next. A slight overlap is usually not needed; most wallpapers are butt-joined (edges meet precisely). Smooth each strip as you go to remove bubbles.
- Smooth seams. Use a seam roller or the edge of your smoothing tool to gently press down the edges where strips meet. This helps the seams lie flat and invisible.
- Trim around obstacles. If you have electrical outlets or light switches, hang the paper over the openings and smooth it in place. Then, use the utility knife to cut out the hole shapes and tuck the paper around the edges. Reinstall outlet covers. Corners and edges can be tricky; take your time to ensure straight lines.
- Final cleanup. Once all strips are up, wipe the entire wall lightly with a clean, damp sponge to remove any paste residue. Step back and check for missed bubbles or loose edges. Any minor flaws can often be smoothed out now.
Tips and Common Mistakes
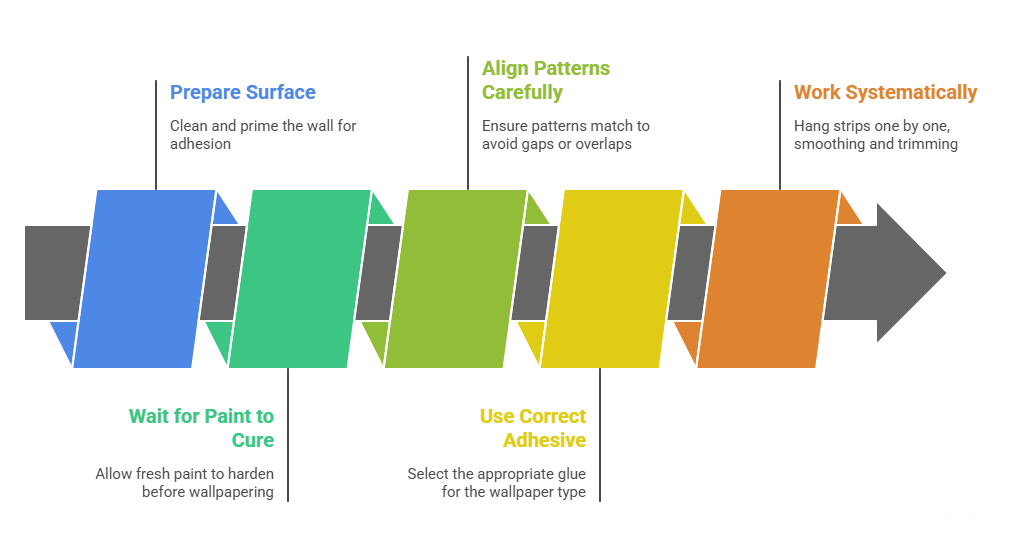
- Don’t skip prep. The most common error is rushing to hang wallpaper without proper preparation. Even the best wallpaper will eventually peel or bubble if glued onto a dirty, glossy, or uneven surface. Spend extra time cleaning and priming.
- Wait for fresh paint to cure. Avoid wallpapering walls painted in the last month or so. Paint needs time to fully harden; otherwise, the wallpaper paste can soften or lift the paint, causing problems.
- Be patient with patterns. Patterns often don’t line up perfectly on their first try. Keep extra wallpaper on hand in case you need to recut or restart a strip. Align designs carefully to avoid gaps or overlaps.
- Use the right adhesive. Not all glue is created equal. A heavy wallpaper or one with a large repeat might need a stronger adhesive. Always follow the wallpaper manufacturer’s recommendations.
- Work systematically. It’s easy to get off-track. Hang strips one by one, smoothing and trimming as you go. If you make a mistake, gently peel off the strip and reposition it before the paste dries.
With care and preparation, wallpapering over painted walls is entirely doable. By following each step—preparing, measuring, pasting, and finishing—you’ll turn a painted wall into a beautifully patterned feature without the hassle of stripping old paint. Take your time, double-check your alignment, and enjoy the transformation of your space!