Pressure washing your home’s exterior before a fresh coat of paint is generally a must. Cleaning removes hidden dirt, mold, mildew, and peeling paint so that new paint can properly stick. If you skip this prep, any leftover grime or chalky residue will act like a barrier – causing paint to bubble, flake, or fail early. In this article we explain why a good wash is important, how to do it safely, and when in the painting schedule to fit it in. You’ll learn tips for a clean, dry surface that gives your new paint the best shot at looking great and lasting a long time.
Why Pressure Wash Your House Before Painting?
Pressure washing is basically exterior prep work. A strong jet of water (often mixed with a mild detergent or bleach for mold) blasts away the invisible film of grime that builds up on siding over months or years. This dirt can include dust, pollen, cobwebs, algae or mildew, and even chalking from old paint. By power-washing the siding, you reveal a clean, bare surface for the primer and paint to grip. For example, Angi’s List notes that washing “removes the dirt, mold, mildew, and other grime that can prevent paint from properly adhering”. Industry experts agree: even if walls look clean, hidden dust or mildew can cause new paint to peel off quickly
Pressure washing before painting pays off in two big ways. First, it improves adhesion – paint bonds much better to a clean surface, giving a smoother finish. Second, it extends the life of the paint. Paint applied to a clean wall lasts far longer than paint laid on top of dirt. In short, skipping the wash is a shortcut to a paint job that needs recoating sooner.
What Happens if You Skip Pressure Washing?
Skipping the pressure wash step can really backfire. Any dust, pollen, or powdery paint residue left on the siding will prevent new paint from adhering firmly. In fact, one paint-industry source warns, “foregoing pressure washing…will leave residue in place that won’t allow the paint to fully stick”. As that residue loosens, it will drag the paint off the surface. You’d see bubbling or peeling paint in just a few years instead of a decade. For example, one study found that painting over a dirty surface gave a finish life of only 2–3 years – whereas washing first can make the same paint last up to 7 years.
In practical terms, painting without a wash is doing yourself a disservice. Your new paint will look dingy sooner, and you’ll have to repaint again much earlier. By pressure washing first, you avoid wasting paint on dirt and give the paint its best chance to bond and stay beautiful.
What Does Pressure Washing Remove?
A pressure washer power-clean gets rid of all sorts of build-up that you might not see by eye. Typical things it blasts away include:
- Dirt, dust, and cobwebs: Years of airborne grime will literally wash right off.
- Mildew, mold, and algae: These thrive in damp shaded areas and can stain or degrade paint if not removed.
- Chalking or oxidized paint: Old paint that’s breaking down can leave a chalky powder (called “chalking”) on the surface. Pressure washing clears this off.
- Loose or flaking paint: Any paint that’s already peeling will soften up and come loose. (Be aware: pressure washing isn’t meant to strip all old paint – you should scrape or sand off really bad flakes first.)
By removing these contaminants, pressure washing creates a smooth, bare substrate. Fine Homebuilding magazine explains that “pressure washing can help remove dirt, mildew, algae, and oxidation — all key contributors to paint failure”. In short, pressure washing eliminates the hidden yuck that would otherwise sabotage your paint job.
Pressure Washing vs. Soft Washing (or Hand Washing): Which Should I Use?
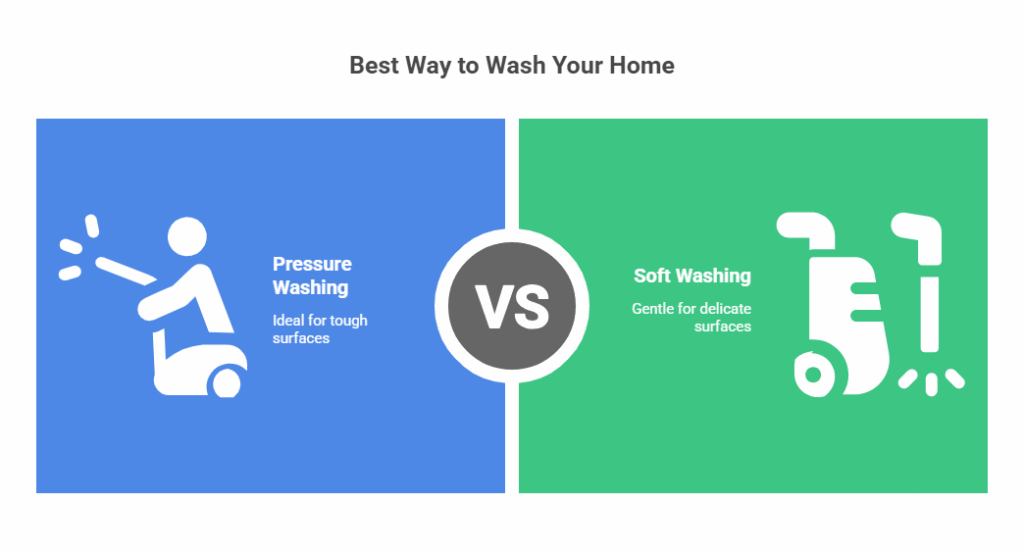
Not all washing is the same. Pressure washing (or power washing) and soft washing are two approaches:
- Pressure washing / power washing: This uses a high-speed water spray (often cold water, though power wash can imply heated water) to clean the surface. It’s very effective on tough grime and can reach high areas with ease.
- Soft washing: This is a gentler method. It uses low-pressure spray along with specialized cleaners (mild bleach solutions or soaps) to remove mold, mildew and dirt without the same force. It’s often used on fragile surfaces or where high pressure could damage the material.
- Hand washing: In theory you could scrub siding with soap and a brush, but it’s very time-consuming and less thorough. It’s really only practical for small spots or very delicate areas. For example, Angi’s cleaning guide notes that hand washing is much slower and less effective, so it’s “typically best to reserve hand washing for small areas or more fragile surfaces that can’t withstand powerful streams of water”.
In practice, most houses can handle a pressure wash just fine if done correctly. Vinyl, stucco, wood or fiber-cement siding can usually take moderate pressure (see the next section on safe use). However, if you know a section of siding is very old or painted with a fragile finish, you might opt for soft wash or hand wash on that part. Just remember: the goal is clean, and whatever method does that best is the way to go. (If in doubt, using a soft wash solution is better than skipping cleaning entirely.)
How to Pressure Wash Safely: Tools, Settings, and Tips
Use caution: a pressure washer is powerful and can damage surfaces or injure you if misused. Follow these tips for a safe, effective wash:
Figure: Use a wide-angle spray and stand back. In this illustration, the operator starts the nozzle pointed away from the wall, then sweeps in a gentle, downward angled motion. This prevents water from being forced under the siding. Always start a few feet back from the wall and adjust so the spray is strong enough to clean without gouging the siding. Never use the zero-degree (red) nozzle on siding – it’s a needle-thin stream that can cut into wood or vinyl. Instead, attach a 15° or 25° “fan” spray tip (often yellow or green) to cover more area safely. Aim the spray at a downward angle (straight out or slightly down from the nozzle) to avoid injecting water under trim boards.
- Start from the top, work downward: Rinse off loose debris and dirt before applying any cleaner (you can even use a garden hose or the washer on a light setting first). Then wash the house from the top down so dirty water doesn’t run over cleaned areas.
Keep the wand moving: Don’t hold the spray in one spot. Move in steady, overlapping strokes. This prevents accidentally cutting into the siding or leaving blotches. - Maintain distance: Hold the nozzle several inches from the surface (often 1–3 feet away) and increase distance if the surface seems to “ruffle” or damage. A good rule is to stand back 8–10 inches to start and then move closer as needed.
- Use the right amount of pressure (PSI): Gas washers for homes usually use between 2,000 and 3,000 PSI. But not all materials need that much. Vinyl siding can handle up to 2,500–3,000 PSI, while stucco, aluminum, and soft-grain wood only need 1,200–1,500 PSI. Change the setting on your washer (or use a lower-power electric unit for small jobs) so that you can clean without hurting anything.
- Wear protective gear: Always put on safety glasses or goggles, gloves, and sturdy shoes. Pressure spray can fling debris back at you. Never point the spray at people, pets, or yourself.
- Be careful around openings: Don’t spray directly under windows, doors, vents, or siding seams. High-pressure water can get behind the siding boards or into the frames. You should only spray straight on or down. Covering outdoor electrical outlets or lights ahead of time will also keep them safe.
By following these precautions, pressure washing becomes a safe process that leaves your house gleaming and damage-free.
When Should I Pressure Wash in the Painting Process?
Plan to wash after you’ve scraped off any loose paint and repaired damaged areas, but before you apply primer or paint. Ideally, pressure wash just a day or two before painting is scheduled. This timing allows the siding to dry fully but isn’t so long that it can get dusty again. Industry guidelines suggest washing within 24–72 hours of painting. For example, Advantage Pro Services notes you should plan on at least 1–3 days between washing and painting, depending on conditions. Similarly, Angi.com advises waiting “24 to 48 hours after washing” before painting to ensure complete dryness.
Avoid washing your walls weeks in advance. If too much time passes, new dirt or cobwebs will settle on the cleaned surface. If this happens, it’s wise to rinse again with fresh water right before painting. In fact, The Spruce guide recommends re-spraying lightly if “a couple of weeks pass before you can get to painting”. In short, treat pressure washing as the final prep step: do it last, then paint once everything is dry.
How Long After Pressure Washing Can You Paint?
The rule of thumb is: when it’s bone dry. Most experts say to wait at least 24 hours, and often up to 48 hours or more, before painting. Wood and fiber-cement siding can hold a lot of water. For bare wood, for example, one source recommends waiting a full day or more until the wood feels completely dry. Other factors affect drying time: cool weather, shade, or recent rain can stretch out drying. Sunny warm days will speed it up.
In practice, check the surface by touch or a moisture meter. If you still feel a damp spot anywhere, give it more time. Remember, “moisture in or on the surface” is what will ruin paint. Patience here is worth it – painting on even slightly damp siding will lead to bubbling or peeling as it dries. Once the wall feels 100% dry, you’re good to go with primer and paint.
Can I Pressure Wash Myself or Should I Hire a Pro?
If you’re comfortable with tools and safety gear, you can DIY pressure wash. Homeowners can rent an electric or gas washer and do a decent job. Pressure washing before painting can be a fun weekend project for a careful DIYer.
But a lot of professionals say that for the best results, you should let the experts handle it. Professional painters and pressure-washers have tools that are as strong as those used in factories (often 50 times stronger than a garden hose) and know how to avoid making mistakes. They know how to change the PSI for different materials without hurting them and which cleaning products to use. They can also safely do all the prep work, like moving furniture and covering plants. One painting contractor says that they are taught how to “handle the pressure hose without damaging the surface.”
Moreover, professionals will carefully ensure the house dries correctly before painting. As HomeWorks Painting notes, surfaces “must be thoroughly dry first” or else primer will fail. If you’re short on time, unsure about technique, or tackling a very large project (like a multi-story home), hiring a pro gives peace of mind. Professionals also have insurance if something goes wrong. On the other hand, DIY saves labor costs and can be done on your schedule. If you do it yourself, follow all the safety tips above. Otherwise, getting a qualified cleaning contractor is a safe bet to prep your house properly.
How to Prepare Your House for Pressure Washing
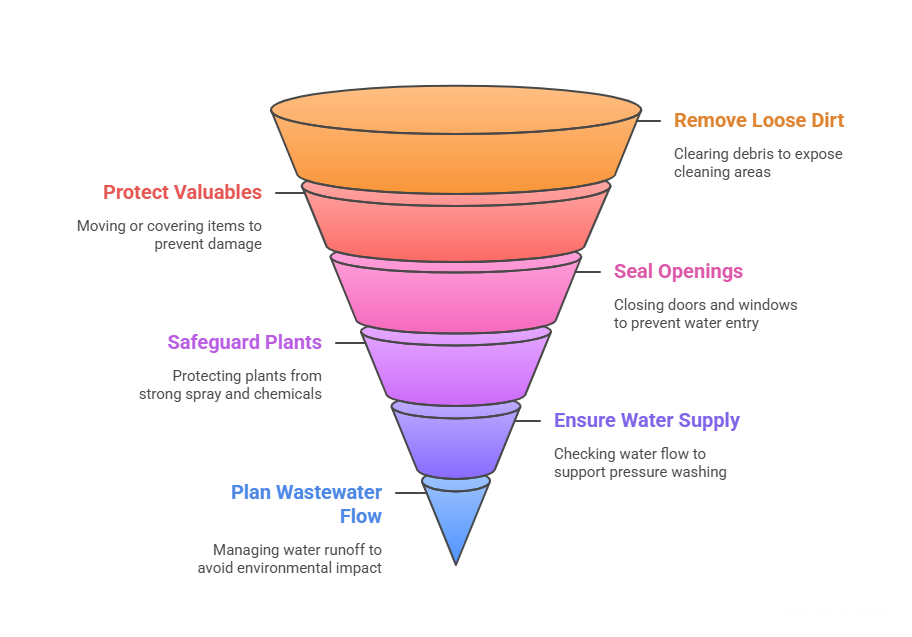
Proper prep makes the job easier and prevents accidents or damage. Here’s what to do before you spray:
- Get rid of loose dirt: Before pressure washing, use a broom or a garden hose to sweep or rinse off leaves, cobwebs, and heavy dirt. This stops dirt from getting stuck in your washer and lets you see where cleaning is most needed.
- Take things away or protect them: Remove things like porch furniture, planters, wall art, light fixtures, and so on from the outside walls. Put away or move anything that can be moved, like potted plants, patio chairs, and hanging baskets, so they are not near the washing area. Use plastic or tape to cover anything that can’t be moved, like lights, outlets, or doorbells that are already there.
- Close and seal: Lock all the doors and windows so that water can’t get in. If you can, seal off any gaps or vents. If rain is expected soon after washing, try to change your plans. You want the weather to be clear while it dries.
- Keep plants safe: Use drop cloths or plastic sheets to protect delicate flowers and shrubs near the house. Your cleaning mix might be biodegradable, but the strong spray can still strip leaves. Watering plants before and after can help spread out any soap.
- Make sure you know where your water comes from: A lot of water is used by pressure washers. Make sure the outdoor spigot has a good flow. If not, arrange water barrels or a booster.
- Plan waste water flow: Be mindful of where the rinse water goes. Divert it from storm drains or ponds if it contains chemicals. Rinse water from mild soaps is usually okay to flow over soil.
Taking these preparation steps will save headaches. When everything around the house is safe and protected, you can focus on cleaning the walls. And remember to inspect after cleaning: once the siding is dry, check for any spots you missed or any damage that occurred so you can address it before painting.
FAQs
How soon after pressure washing can I paint?
Always let surfaces dry completely first. In warm, dry weather you may be ready in 24–48 hours, but in cool or humid conditions it could take longer. Wait at least one full day, then feel the wood or siding – if it’s even slightly damp, postpone painting a bit more.
Can I paint without using a pressure washer?
You can, but it’s not a good idea. If you paint over a dirty or chalky surface, the paint will normally not stick and will start to flake in a few years. Cleaning first gives the paint a clean, solid surface to stick to. If you omit the wash, your paint job will probably not last as long.
Will pressure washing hurt my siding?
If done well, pressure washing is safe for most siding. When the spray is excessively intense or not targeted correctly, problems happen. A close, concentrated spray can etch wood or force water under clapboards. Always use a wide spray nozzle, stand back a few feet, and spray down. Try it out in a place that isn’t very visible first. You can avoid harm by utilizing the correct amount of pressure and technique.
Do I need to use detergent or bleach?
Plain water often does the trick for general dirt. If you have mildew or mold spots, a mild cleaning solution helps. Many homeowners mix a small amount of bleach (about 1 part bleach to 10 parts water) or a cleaners into the washer to kill mold. Just apply it carefully and rinse thoroughly. After using any detergent, be sure to rinse until all soap is gone.
My house looks clean – do I still need to wash it?
Yes. Exterior surfaces often collect invisible grime. Even if it looks clean, your siding may have pollen, grit, or mildewy film that you can’t see. As one paint contractor notes, “your home’s exterior might look clean, but that doesn’t mean that it is. There’s likely dust, mildew, dirt, and other buildup on the surface”. A quick wash ensures nothing is left behind to ruin the paint.
Is power washing the same as pressure washing?
Basically, yes. Both terms describe the same concept of using high-pressure water to clean surfaces. Technically, some people call it “power washing” when they use heated water, and “pressure washing” with cold water. But in practice they’re interchangeable – both will clean your siding before painting.
Conclusion
In summary, pressure washing is a critical step in exterior painting prep. It uncovers a truly clean surface so paint can adhere fully and last longer. Taking the time to wash and prep means your paint will look better and resist peeling for years. Just be sure to follow safe pressure-washing practices, protect your property, and let everything dry. By planning this step carefully (or hiring professionals to do it), you’ll set the stage for a beautiful, long-lasting paint job on your home.